Thursday, December 31, 2015

52Quilters - what a year!

Hey quilty followers, it's Chris from 52Q here with a little year-end wrap up and update.

It has been a great year for the 52Q, what was just a little idea that I was toying with in the run up to Christmas 2014, has become a huge project with a strong following across social media. Over the course of 2015, 52 amazingly talented quilters shared their lives via our Instagram account.  We also blogged and tweeted from time to time!

Do you remember all these wonderful quilters?
As the year draws to a close we are getting ready to welcome another 52 Quilters into the mix! Many of you gave feedback and have shared what you'd like to see from the project, and so I'll be doing my best to make 2016 bigger and better!

The 52Q blog has already had a fresh coat of paint with a minty-tangerine feel, and I'm recriuting new quilters! If you'd like to participate visit the get involved page and fill out the Google Form. Applications close on January 8, and everyone who applied will get a response by January 31.

Looking forward to another great year!

Saturday, December 12, 2015

What Modern Means to Me

I couldn't end this week of blogging without sharing some of my personal experiences, thoughts, feelings, beliefs and goals as a modern quilter. 

First--a disclosure.  I co-founded a modern quilt guild in Sarasota FL over 3 years ago and our Guild joined The Modern Quilt Guild.  Last year, I was elected to the Board of MQG.  However, the views expressed in this post are totally just all about ME!!!

I wasn't sure I was a modern quilter when I discovered modern quilting

Confession time--although some of my older quilts were inspired by mid-century modern art, I wasn't sure I was a modern quilter.  I was still very rooted in the artquilt world most of the time--these quilts were for the wall, not the bed. 

My quilts for every day use were improvisationally designed and pieced, but I wasn't consciously following a particular set of principles. My older modern quilts looked like this--black was my negative space color. :
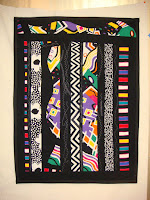
Wall Hanging mad about 10 years ago

Lap quilt made about 15 years ago


 So, at our first Guild meetings in 2013, I didn't have anything new to show! And, guess what, it didn't matter because like my Guild friends, I was falling in love with what I was seeing on Instagram, Pinterest, Blogs and the MQG website.   I was LEARNING what modern quilting was about and I liked it.  I felt energized, challenged and I just wanted to start designing my own modern quilts.

Here's a quilt I made in 2014--a disappearing 9 Patch with a LOT of negative space--and a few improvisationally pieced blocks.   I had to almost force myself to use white--it was the best way to break free from my old (comfortable) color palette:

Here's another modern quilt from 2014--it's a wall hanging. I started playing with gray and fracturing negative space.   And, I simplified a 4 patch into a 3 patch. 

 I Still Love, Honor, Respect and Use those Core/Basic Quilt Construction Skills

Modern quilts need to be well-made--modern does NOT mean sloppy, or falling apart when it's washed.  So that meant I had to sharpen my rotary cutting, piecing and quilting skills a bit.  Especially when I wanted to make larger lap quilts.  I'd been so used to working in a smaller format that a quilt that measured 50 by 70 inches or more seemed ENORMOUS. 

And, well-made doesn't mean PERFECT!  But, if I want my 9 patch points to match in that modern quilt, then, I really need to use the tools and skills to make that happen.  The white disappearing 9 patch quilt above is one that I don't pull out often because it's not as well constructed as I would like.  I learned a lot when I made it--it was just a rite of passage.

In 2014, I made this disappearing 4 patch--much better constructed--my skills were firming up again and the finished product brought my vision to life:

It's a Really, Really Big Diverse World--and I LOVE that!

The modern quilt world is full of people who want to try new things.  They are curious about people who bring their cultural traditions to the modern world to enrich our dialogue with each other.

The Modern Quilt Universe is Changing Faster Than We Realize...

Yes, there are some design principles that modern quilters have embraced.  We love asymmetry, open space, playing with scale, modern color palettes, etc.....  We are inspired by mid-20th century modern art and architecture.  Like this quilt I made last year--it's a nod to Frank Lloyd Wright.


And we modern quilters are inspired by quilt traditions like blocks that we love--here's a modern patriotic quilt idea I'm playing with.  That star block is traditional and using 'USA' themed colors is also traditional.  However, I'm sure I can bring those traditions into the modern quilt world. 
 

By the way, there are LOTS of MYTHS about what modern quilts are like. I've blogged about that in the past.

Where I'm Headed Now....

I think modern quilters can start with one question: 

What aspects of modern quilting do I want to explore, reinvent, play with and learn about?  

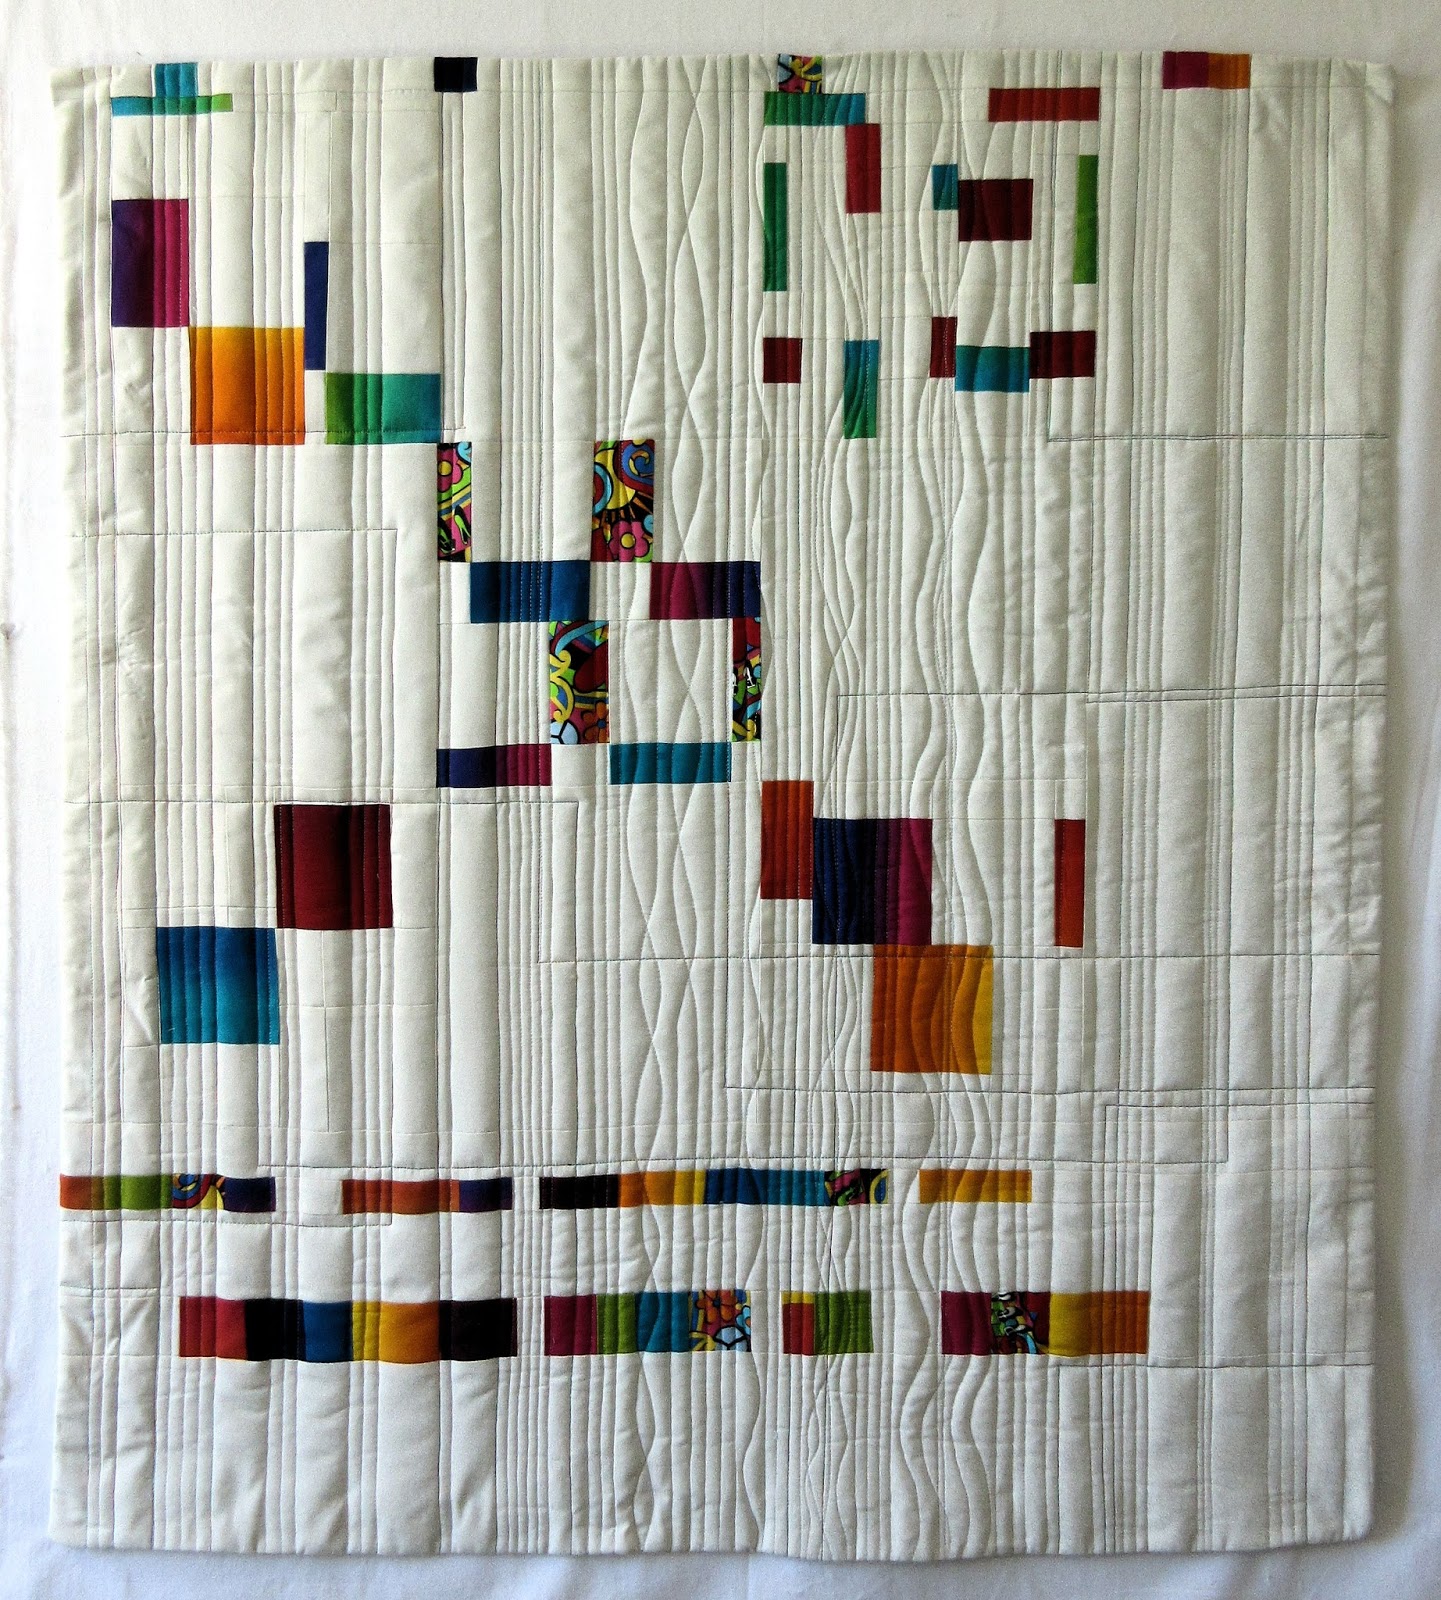
As for me, I'm playing with how I can use saturated color as negative space--is that even possible??


In progress--experimenting with color and layout. The final quilt will be exhibited at the Texas Quilt Museum --Modern Quilt Guild Juried Show.
 
I'm curious about all these new modern batiks I'm seeing that have interesting graphics.  How will they play with modern solids, prints or grunge or.....???  See the batiks in the in-progress quilt above?

I'm using the mini-quilts I make for swaps to practice my machine paper piecing skills to make precision pieced blocks.


I'm playing with scale and curves and precision pieced points--sometimes in the same quilt!!


I'm (finally) writing a book with techniques and modern quilt designs that I'd love to see other modern quilters try out.

And, above all, I'm having a lot of fun.  

As a modern quilter, I feel free to follow my personal vision.  I love the awesome modern quilt community for its openness.  I appreciate the fabric manufacturing companies for seeking out and supporting new fabric designers who have a fresh take on graphic design.  And, thanks to these companies for all these luscious new solids, ombres and grunge fabrics.

I truly do not worry or pay attention to any nay-sayers or modern quilt police. You know, those critical quilters who only have negative things to say about work by others.  Yes, we have quilt police in the modern world--they're so busy enforcing the so-called rules that they can't see what's happening right in front of them.    Sadly for them, they are missing all the vibrant new ideas that are happily showing up in every corner of the modern quilt universe.

My personal mission is to encourage and support ALL QUILTERS who want to join in this modern movement.  That's why I'm writing my book, making new quilts, going to QuiltCon, supporting my Guild, blogging and teaching workshops. Lucky, lucky me that I get to live this creative life.


Well, this is my last post on 52 Quilters!  

Thanks so much for reading these postings.  I appreciate all of you who have started following me on Instagram (@carole_lylesshaw).  I hope you'll follow my future posts on my blog www.CaroleLylesShaw.com.  In 2016, I'll have give-aways and other exciting announcements and I would love to see you there! 

Happy Quilting!! 


Fast Pieced Mug Rugs

Here's another really quick tutorial.  I like making mug rugs--but I want to make them FAST because I'm often putting them in the Swap Quilt package that has to go in the mail in the morning.

Here's a tutorial--I didn't invent this.  I've seen different versions of this process in a lot of places, including on an episode of one of the TV quilt shows last year.

Step 1: Cut 4  squares of fabric measuring 6-1/2 inches.  I like large mug rugs so I start with larger squares.  sometimes, I use 4 different colors or fabrics.  In this example, I used 2 fabrics.
Fold these squares into triangles and set them aside.


Step 2:  Cut one square of fabric measuring 7 inches and a piece of batting slightly larger. I use cotton batting but you can use anything you like.  This fabric will be your backing.  Then, quilt these two layers.  I use my walking foot and sew random straight lines or free hand curves.  Because it's a mug rug, I take about 2 minutes to do the quilting--nothing fancy!!  After quilting, trim down to 6-1/2 inches.

Step 3:
Layer your 4 triangles with the RIGHT SIDE of the back facing UP.  You'll be turning this inside out eventually so the backing will be on the back of the mug rug.
Add first yellow triangle

Add first blue triangle

Add 2nd yellow triangle

The 2nd blue triangle is added and is on the top left.


FOLD THE two triangles back and then put the blue UNDER the yellow.  Your triangles are now interwoven.  Pin them to hold them together for the next step.

Step 4:  Sew a straight stitch seam around all four sides.  I use a quarter inch seam.  Sew straight from one end to the other.  In the photo below, you can see my seams.  I clipped a bit off each corner to help me turn the mug rug inside out. You can just see the backing inside.  I'll use the wooden point turner to help me get the corners shaped up.  Turn the mug rug inside out!
 
 Step #5:  Turn it inside out and use something sharp to poke out those corners.
Poking the corners to get the mug rug  square.

Finished mug rug.  

I press them very flat with steam.  You may notice that the upper right corner is a tiny bit off.  I probably didn't line up the tip of that yellow triangle properly when I pinned the triangles before I sewed the edges in Step 4.  I can easily fix this by turning it inside out again, and re-sewing that one side.  (But I probably won't....I'll just use it at home and make more!)

Options

Add more quilting--As an option, you can add more quilting by machine or hand after you turn it inside out.  But remember that the back of the mug rug will be quilted. Sometimes I quilt a circle, spiral or small square right in the center.

Make bigger mug rugs!  I've used this same process to make a larger rug for my teapot to sit on--I'm a tea drinker! 

Use a pieced square instead of the triangles.  Sometimes I use improvisational pieced blocks as the back OR the front or BOTH.  If I don't use the triangles, then I leave ONE side partially open when I sew around the edge in step 4.  Then, I turn it inside out like a pillow case and stitch the 4th side closed by sewing around all 4 sides with a decorative stitch.  

Thursday, December 10, 2015

No Sew Quick Fuse Fabric Cards Tutorial

Hi,

It's the holiday season, and sometimes we want to make an easy hostess gift.  How about a set of fabric greeting cards that you can make in 20 minutes or less. I thought I'd share one of my favorite easy ways to make your own greeting cards that can be used for all sorts of occasions.

No-Sew Quick Fuse Fabric Cards

I buy good quality blank cards in a very pale ivory color.  They come with the card and matching envelopes.  You can find blank cards in boxes in craft shops or online (such as  Michael's, Hobby Lobby or JoAnn's).  I buy the kind with deckle edges or just plain straight edges.  They are made with a qood quality card stock that feels nice and looks 'expensive'.  Strathmore even makes a 'watercolor' card--really nice weight!  I tend to spend less than $10US for a set of 10 or 15 blank cards.  That means the card itself will cost less than a dollar and the fabric and fusible costs me pennies.  Quite a bargain when you consider that even a simple greeting card costs $4 to $6 in the stores these days.

How to make your card!

SCISSORS:  I use a small pair of very sharp scissors to cut the fabric. I have a pair that is teflon coated so no danger of the fusible sticking to them and they are very, very sharp so I can cut intricate shapes.

First, I cut squares or rectangles of various fabrics or pull pieces from my scrap bin. I look for pieces measuring at least 5 inches.  In these samples, I used batiks.

I fuse a light weight fusible on the fabric pieces-- I use Pellon 805 WonderUnder.  This fusible has paper backing on one side.  But, any medium to heavy weight paper backed fusible will work.

I cut a piece of fusible and lay it paper side DOWN on my ironing surface.  I arrange the small pieces of fabric on it.  Fabric is RIGHT side up and is laying on the fusible side.


VERY IMPORTANT STEP---BEFORE I IRON, I put a piece of plain kitchen parchment paper on top of the fabric to protect my iron.  Iron for a few seconds. Let it cool. (You can also use any non-stick pressing sheet like the one HERE.)  But parchment paper works really well and I like the fact that I can see through it. 


After fusing, I cut around the fabric pieces and remove the paper backing. To get the backing paper off, run a sharp pin across the paper side, just to barely tear into it.  Using the pin or your fingernail, you can peel the paper off.

Next step is to cut out your shapes.  I use a small pair of very sharp scissors to cut the fabric with fusible on it.  (Remember to remove the paper. )

To make the house card below, I cut random shapes from different batik fabrics to make a small wonky house.  No drawing or measuring.  I cut the pieces and laid them down directly on the card--NO IRONING Yet.   Just cut and test until I like the design.  Then iron the fabric pieces right on to the card using DRY medium setting on the iron.  Remember--NO steam.  BEFORE I IRON, I put a piece of plain kitchen parchment paper or a pressing sheet on top of the card to protect my iron and to protect the card.   

Here's the result. Fun and informal!  I think I'll make some more of these little houses.  I already have lots of batik fabric with fusible already on it.  Each house will be different and fun!


Most of the time, I create abstract designs.  I look for fabrics that coordinate or contrast.  I randomly cut interesting looking shapes.  I lay them down and move them around until I like what the card looks like.   This is an excellent way to use up solids, grunge and interesting prints to make abstract art.

Just two pieces of fabric....

I keep the shapes simple.  I also use contrasting sizes--like the fat gourd shape has 3 skinny companions!


Here's a picture of a set of cards I made for our Guild to sell.

A few of these cards were made with sewn scraps --left over parts of improvisational pieced blocks.  Look at upper right card in top row; and in row 2, 2nd from the right and far right; bottom row, far right.

Sometimes I fussy cut a motif for a card, such as the flower on the card in the middle row, 2nd from left.


I love making these cards--fast, easy and personalized.  I can write messages on the cover (I leave lots of blank space) and a personal message on the inside.  I use them for birthday cards, gift cards and thank you notes.  A set of 6 or 8 of these would be a lovely hostess gift.

And yes, if you wanted to, you can add stitching--but if you do, I suggest you cut a piece of matching card stock and glue it to the inside front of the card to cover the stitching. 

CLEANING FUSIBLE OFF YOUR IRON!  

If you get fusible on your iron, there is a very inexpensive and less toxic way to clean it.  Make sure the iron is set on medium high.  Place an unscented unused dryer sheet on a piece of parchment paper or a teflon ironing sheet.  Run your hot Iron directly over the dryer sheet for a few seconds.  If your iron is very dirty, you may need to use two sheets.  (I never, ever use those 'iron cleaner' chemicals....way too toxic for me.)  After it's clean, I run the iron over a wet paper towel just to make sure there's no residue.  These dryer sheets also clean some inks and paint or other types of glue off irons.  They don't scratch or leave any residue.

Follow Me.....

I hope you're enjoying these postings.  Please follow me over at www.CaroleLylesShaw.com or on Instagram @carole_lylesshaw.  I'll have some interesting give-aways after January 1!


Wednesday, December 9, 2015

How to Get Stuff Done!

There are lots of things about ME that keep me from getting things done--MEANING GETTING QUILTS FINISHED.

For example, suppose I'm in a Swap and I have to make a miniquilt to be mailed in 8 weeks.   Here's what typically happens.....
  • By personality type...I am a Procrastinator.  I believe that time is flexible and that magically, the time I need to finish a project will magically appear.  There won't be any emergencies.  My sewing machine will work perfectly.  And, the binding will only take me 30 minutes to sew on a quilt that measures 36 by 40 inches [91 by 101 centimeters].  So, I'm likely to wait until 2 weeks before it's due to start designing.  Meaning no fabric is selected, no design in mind for SIX WEEKS!
  • Or...I'll pull a bunch of fabric and let the pile sit on the floor or the table for SIX WEEKS...After all, if I have the fabric, then I'm almost done, right!


  • I believe that design software will save me.  I'll start a design in EQ7.  I'll try 25 variations..all in EQ7.  OK, now I'm really halfway done, right [Hint: WRONG!!!]
  • I like STARTING new ideas, lots of them.....  So, I have at least 5 projects in one stage or another.  Fabric pulled, test block sewn, maybe a design started in EQ7 or whatever....
  • I have this MYTH that I get more creative when I'm under pressure.  But, looking at my completed projects in the past year, I know this is NOT true. 

My 15 Minute Rule

My cousin Pat taught me a very valuable rule for getting big projects done when I have a lot of different things to do.  Take 15 minutes and work on it.  Set a timer and when the 15 minutes is up, STOP.  [Yes, sometimes I keep going if I have the time.  But, if not, 15 minutes can be very productive.]

Why does this 15 minute rule work for me?  What  makes this a successful strategy?  One word: Organization.  

Step #1--Organize the fabric storage space 

I'm lucky to have dedicated space for my sewing room and fabric storage. But I think these tips could work even if you have limited space or have to share it with another function.

My first step was getting control of the fabric chaos that you see here. 

When I started, my shelves and the floor around them looked like this....and I had storage bins in the other room that were just as jumbled up.

Other parts of my work space looked just as bad. 


About a year ago, I took a few days and purged and organized my fabric by type (prints, solids, etc.) and color.    I purged....bravely getting rid of fabric and miscellaneous crafty supplies that I knew I wasn't going to use anytime soon. 

How to store the fabric so it stayed flat?  Answer:  I bought comic book storage boards at Amazon Comic Boards 

The boards are made of acid free paper and even in humid Florida, I haven't had any problems.  They're also cheap!

I sorted and folded fabric for a couple days.  I had a good audio book to listen to and that helped pass the time.  When I buy new fabric, I IMMEDIATELY fold it onto the boards.  This is a great task to do when you sit and watch TV.   

Here's what my main stash looks like today.  These shelves are IKEA Billy bookcases and they are about 15 inches wide and 11 inches deep.  You can adjust the shelves.  I like this width because it's perfect for folding yardage on the comic book boards. I can see what I have but the fabric doesn't get too dusty or exposed too much to light. They sit in a closet and I can close the doors.

I keep this stash looking pretty good.  In addition, in another closet, I have several plastic bins with fat quarters (sorted by type such such as all low volume FQ's together) and a few bins of batiks and patriotic fabrics.  I'm about to purge some of the bin fabrics--I kept WAY too much and I have a friend who will put them to good use.


Step #2--Organize your  project materials and work area

Next stop was the rest of my room, including my main cutting table.
In the old days, I let my cutting table end up looking like this.  There was fabric I was working with, tools, measuring tapes--all jumbled up. How could I find ANYTHING!!
Now, when I start a project, I get out a plastic bin like this--It's an Iris scrapbook storage bin that measures 14 by 14 by 3 inches.  I buy them from Joann's and recently they were on sale for about $4.00 US.  If I need space for more blocks or yardage, then I'll grab one of my larger plastic bins but the idea is the same.
Iris Scrapbook Storage Case.

Here's a case with project materials in it. I'm ready to work on the next project.  At the far end, I keep my rotating cutting mat, rotary cutter, my scissors, a couple of rulers and my glasses.

I add a label to the project case with project name and probably a due date if there is one.

Case open--Inside I keep printed instructions or other info, including paper piecing printouts.  All the fabric and in-progress blocks would also be stored here. Sketches or EQ7 printouts for the layout wold be added. I took the fabric off the comic boards so I could get more in the case.

When I start working on a project, I get out the fabric and instructions (if any) for ONLY that project. So my worktable looks like this when I start. A calm space that just draws me in. I keep my rulers in a ruler organizer so I can quickly grab what I need. And, the project case is on the floor under the table so when I'm done cutting from the yardage, I can put the yardage back in the bin.  


Ready to go!!

Ready for sewing a block.  I only use Superior So Fine 50 wt for piecing and I keep a large spool on the thread stand on the left of my machine.  Sometimes I use my 15 minutes to prewind a few bobbins for piecing.


Remember the 15 Minutes?  If I only have 15 minutes, I can start doing some cutting because my work space is already set up.  No wasted time looking for the fabric or the block cutting instructions or my rotary cutter or whatever.

When the project is completely done, I fold the yardage back on the comic boards and put it back on the shelves. I toss out miscellaneous notes unless I need them for pattern writing.

Oh, I keep a large plastic bin for scraps under the cutting table.  I just toss all scraps in as I go.  I never sort them.  I tend to go to my scrap bin to make improv blocks and might sort them at that time.  That's another 15 minute project--organizing scraps by color but I rarely do that.....


Lastly, I keep myself organized by putting this chart on my wall.  This one lists all Swaps and relevant information right in front of me.

Staying organized has increased my productivity and decreased my stress level.  I love walking into my sewing space and when it starts to get aout of hand....well, I know what to do to get it back in shape!!


Tuesday, December 8, 2015

Be Fearless: Designing an Improv Quilt

I'm writing my first quilting book...as we speak...and one of the projects will be an improvisational log cabin.  This post will give you a glimpse into my design/thinking process for improvisational work.


When I started this quilt, I didn't have a specific size or even an end goal in mind.  All I knew was that I wanted to make a few samples for teaching modern improv log cabin workshops.  But, as I thougth more, I came up with a few goals:

  • Work with a modern color scheme I'd never tried before--using orange, green
  • Experiment with negative space using a lighter color
  • Keep it assymetrical
  • Play with tradition--and reinvent it

I pulled out some fabric in my stash and selected a focus fabric.  The focus fabric would guide the color palette. I looked at the color dots on the selvedge and pulled solids and bold prints that I might use. (Not all the fabrics I chose made it into the quilt.)

Start out Fearless!

Then, I started fearlessly piecing small strips like this.   The strip that's second from the left was a leftover  test strip from another project. Its a free hand cut and pieced shallow curve with white and the print.

 The fabric with the flowers was my 'focus fabric'. You can see it in the next photo in the center of the block. I  added other fabrics and began building some improv log cabin blocks.


Added two solids and one striped fabric to a focus fabric center. The stripe helped a lot but it needs more...


Another block started.  I used the stripe as the center and build around it in a traditional style. 

This block started with one of the pieced strips as its center.  Then I added random sized strips on all four sides.
  Finally, I had a set of blocks that I thought were interesting.  I selected a medium gray solid and added gray frames around each block so that they were square or rectangular.  Notice that the frames are wonky--I 'squared up' the outer edges.  Again, I didn't measure anything.  Then, I  put the blocks on my design wall to see what I liked.
.


Stay Fearless--don't edit too soon

After studying them, I decided to put more grey fabric around them to see how they might look as a larger top.  I turned them around and laid a couple on their sides--decided I really liked that idea.  How did I know what size to make the larger gray pieces?  I cut some large and small strips by 'eye'.  Since I would be piecing all of them together, I wasn't worried about seams showing.

On the wall--sleep on it...

Now...Edit

At this stage, I sort of liked it...so I left it on the wall for a few days and worked on other projects.  I am the type of quilter who always has several projects going.

After a few days, I came back and removed two blocks.  I didn't like the block with the white curve--it was a 'hole' that stood out for me. I also took out the smallest square block.  I like the look of rectangular log cabins.

I was still playing with the layout and continued to move the 4 blocks around and add negative space.

And, here's the final quilt.  


In addition to being a modern take on log cabins, it's also a nod to the traditional 4 patch quilt--only here the 4 log cabins are the patches.  Maybe I should call this 4 Patch Log Cabins Dance!!


One of my signature elements is in the binding.  I randomly added pieces of print and solid to the grey binding fabric.  No measuring!  the quilting is all straightline with my walking foot.

What I Look for When I'm Editing a Design

Some quilters worry that improvisation is a mysterious magical process.   Or that it's all intuitive...meaning you don't think about anything.  Well, improvisation is random AND it's a series of decisions that are informed by a few things:
  • Our cultural and personal color preferences
  • Our knowledge of the color wheel--and all quilters know the color wheel--just look at all those rainbow quilts we make! 
  • Our knowledge of what makes a design balanced or asymmetrical (we call that wonky)
  • Our knowledge of contrast and value (light, medium and dark)
I hope that you enjoyed this glimpse into how I designed one of my quilts.  This quilt with more tips on improvisation will be in my forthcoming book on modern quilting. I teach this process as a workshop showing lots of options for making improvisationally pieced blocks and creating a unique layout.  I expect to publish my first book by March 1, 2016 so visit my blog for updates.